[GCP] Google Cloud에 Gitlab 설치하기
오늘은 GCP에 Gitlab을 설치하는 방법에 대해서 다뤄보도록 하겠습니다.
[ 요구 사항 ]
RAM : 최소 3.75GB
CPU : 최소 2core
OS : Ubuntu 16.04 or Later
[ 인스턴스 생성 ]
https://console.cloud.google.com/compute/instances
Google Cloud Platform
하나의 계정으로 모든 Google 서비스를 Google Cloud Platform을 사용하려면 로그인하세요.
accounts.google.com
Google Cloud에 접속해서 새로운 VM 인스턴스를 생성한다.

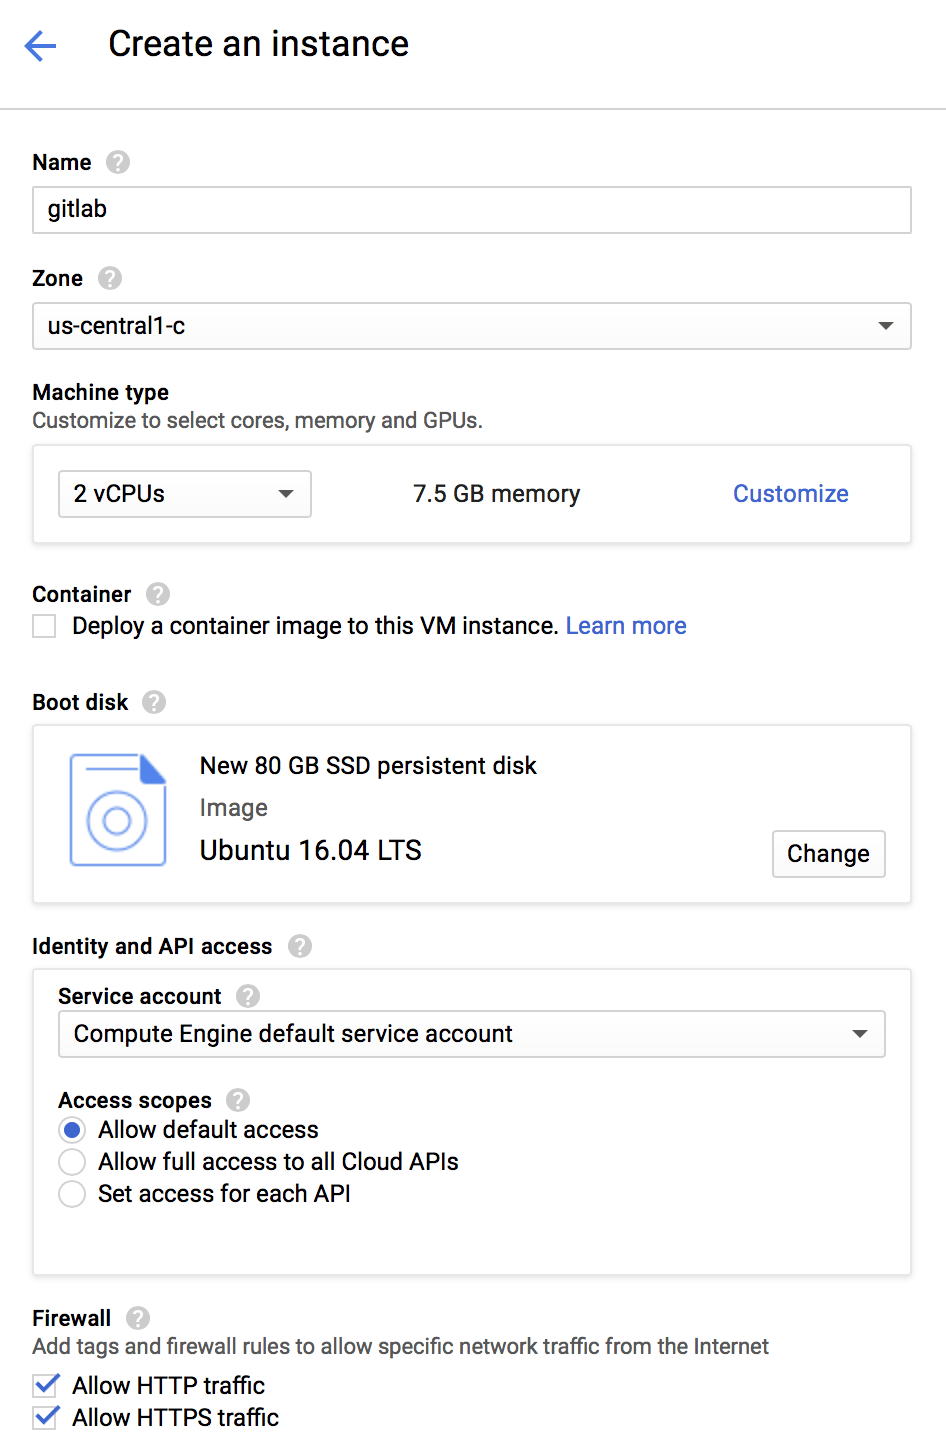
사양을 자신의 크레딧 상황에 따라서 적절히 하도록 하자.

위와 동일하다.
[ GitLab 설치 ]
https://about.gitlab.com/install/
Download and install GitLab
Learn about the various GitLab installation packages and downloads for Ubuntu, Debian, Docker, Google Cloud, and many more.
about.gitlab.com
위 사이트에 접속해 Ubuntu를 클릭한다.

우분투 OS에 GitLab을 설치할 수 있는 방법이 적혀있다.
먼저 SSH나 다른 연결 프로그램을 통해서 GCP VM과 연결해준다 (ssh)
sudo apt-get update
sudo apt-get install -y curl openssh-server ca-certificates
sudo apt-get install -y postfix
무료 버전을 사용해야하기때문에 Community Edition 버전을 설치해야 한다.
curl https://packages.gitlab.com/install/repositories/gitlab/gitlab-ce/script.deb.sh | sudo bash만약 Enterprise Edition 버전을 사용하고 싶다면 아래와 같이 바꾸면 된다.
curl https://packages.gitlab.com/install/repositories/gitlab/gitlab-ee/script.deb.sh | sudo bashgitlab-ee (Enterprise Edition) / gitlab-ce (Community Edition) 참고하도록 하자.
필자같은 경우는 호스팅을 해서 쓰는것이 아닌 도메인을 연결해서 사용할거기 때문에 약간의 설정을 바꿔줘야한다.
sudo EXTERNAL_URL="https://gitlab.example.com" apt-get install gitlab-ee위와 같은 Command가 깃랩에서 알려준 커맨드이다. 필자의 상황에 맞게 바꿔본다면,,
sudo EXTERNAL_URL="https://gitlab.system32.kr" apt-get install gitlab-cehttps://gitlab.example.com -> https://gitlab.system32.kr, gitlab-ee -> gitlab-ce 로 변경해주었다.

설치과 완료가 되면 위와 같이 여우 한마리와 GITLAB이라는 로고가 보이게 되고, 미리 설정해둔 도메인으로 들어가면 추가적인 설정이 완료가 된다.
[ 마무리 ]
필자의 경우 https://gitlab.system32.kr 에 접속하면 아래와 같이 성공적으로 설치가 된것을 확인할 수 있다.

추가적인 문의나 오탈자는 pental@kakao.com 을 통해서 메일을 보내주시거나 댓글에 남겨주세요 :)